Table of Contents
Main Navigation
In order to access the Main Navigation page you should click the bar where your company name is displayed which will send you to a new page.

Account Details
This tab is where you can change your accounts main settings this lets you view your account number as well as change your Time zone and Industry sector. These values should not have to be changed unless they do not match the data that you have. If you require an Account ID change you must contact us to do so.

Branding
This is where you can change your capture sheets logo and colour branding.
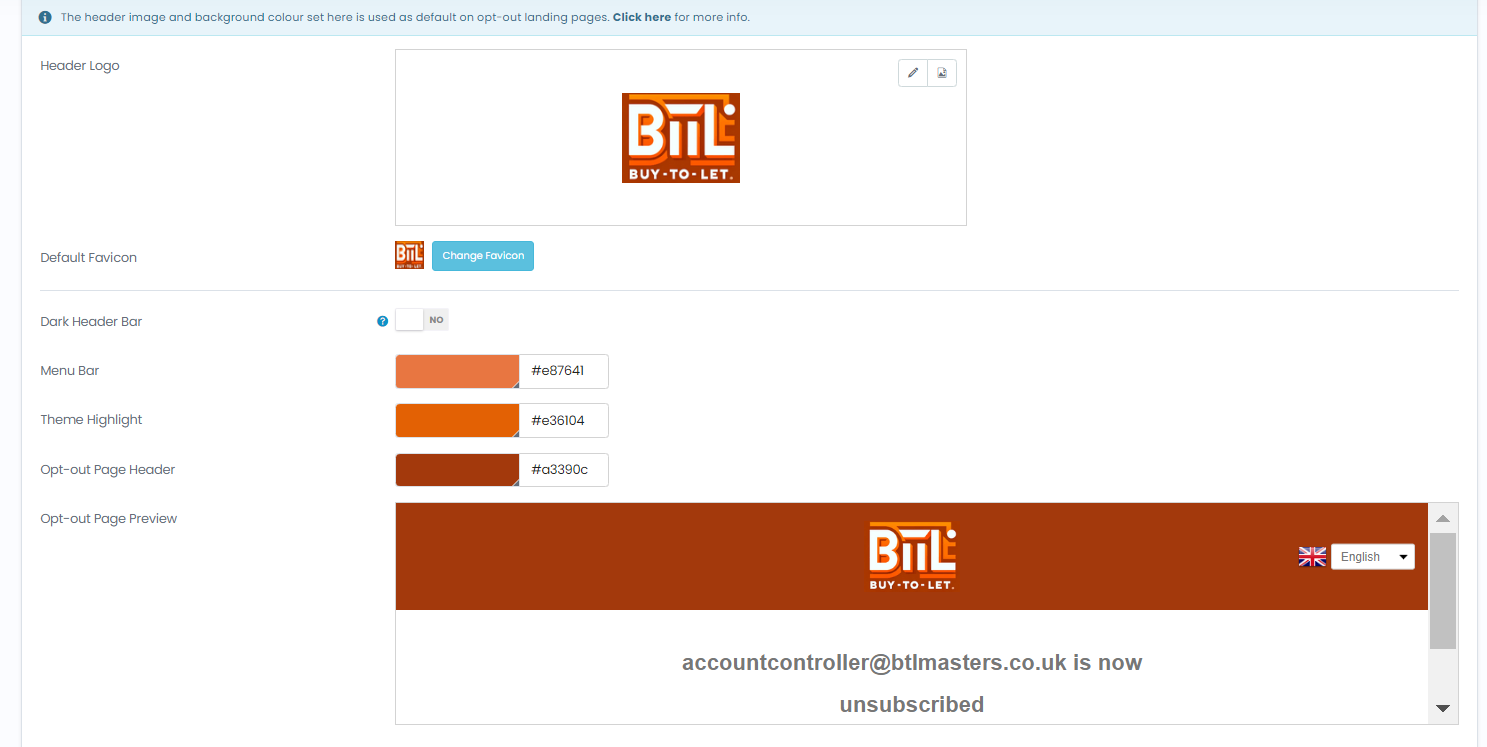
Default Favicon – This is a 256×256 pixel icon that goes at the left side of the tab list and should be changed to something matching your company. A bigger image can be used but may be squashed to fit into a square so it is not recommended you do this.
Dark Header Bar – This is will change the top tab from either white or black and should be used to match your branding colours.
Menu Bar – This is the colour that will change the side bar on the left hand side as well as any menu options.
Theme Highlight – This is the colour that will be shown when you are hovering over an option you are about to pick.
Opt-out page Header – This is the colour that will be shown for the header when they choose to opt out of receiving your emails. And will allow you to preview the result so that you can change it to your colour.
Default Settings
This area is where you can select options for your site.
Default Settings
Abuse Emails: This is where you can enter the email address where all of your feedback and complaint emails are sent they should be sent to a standalone email if you have a large volume of clients.
Default Field Map: This is the way that the CSV file will by default be exported.
Default CSV Delimiter: This is the value used in CSV files to separate values.
Currency: This is the default Currency symbol used in templates and forms.
Custom Logout Redirect URL : This is where users will be sent after they logout of the application.
Log in protection
Two Factor Authentication: This allows you to decide whether or not the user has to use 2FA in order to access their account every time. The recommend setting is to force it on for every account to ensure your data is protected.
Trust Device & Location : This allows you to set whether or not the user must input a username and password everytime or if they will be accepted if they use the same location every time. This can be set to on however you must ensure that nobody outside the company can have access to a computer easily i.e. a reception or at a café.
Trust Device & Location Duration : This is the time that the server will remember the users pass before asking them to reinput them again.
API
In the API tab you can enable webhooks that allow you to send data to other applications so that they can be adapted into something else there are many catch cases and all follow the instructions of.
Trigger hit? Is Webhook On? Send user to website!

Connected Apps
This is an area where you can use apps that have been pre-installed for you to use these include instapage and google analytics. These are not needed in order to use capture but can be used to add some more customisation options and therefore will not be talked about in this guide.
You can learn more at : https://app.connectgroup.co.uk/help/app_directory/nameOfApp
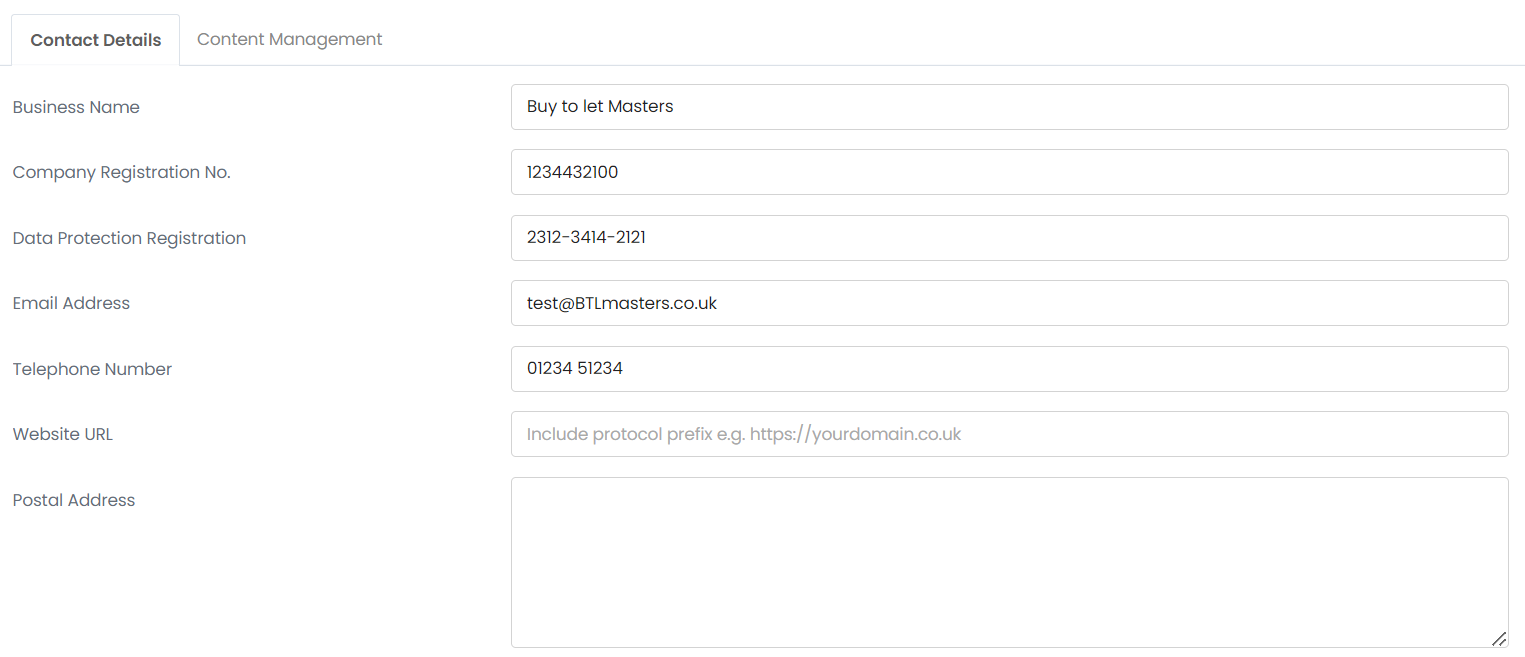
Data Privacy
This area is where you can change details about your company that are stored on Capture. This is also where you can add your data protection information which should be done before you begin sending out emails or forms. As well as this there is a side tab for allowing the public to access data as per the “freedom of information act 2000″.
Lists and Users
Adding New Users
Adding new users is the description of anybody who will be receiving your emails. Whilst they are called users, which can be confusing, they actually the ones who you will be trying to market to. These users will not have a login and cannot access the website. For best practice it is best to always add these on a CSV file as it removes the likelihood of making input errors.
To add a new user there are two options:
Adding a single user: To add a single user first look to the right side of the page and click the button that says “New User”. Once you have filled out the details you can add a user and it will be added. This user will not be in any list and will not be included in any emails until it is put into a list.
Adding a list of users: To add multiple users at once you have to first group them into a list where it is best that they have similar attributes so that when sending an email you can bulk send to that whole list without having to exclude multiple accounts. Then you can fill out all the details and once that is done upload your CSV file to that list and save.
If you are unsure how to upload it as a CSV the best way is to download the file on excel or google sheets and rename it to
FileName.CSV
Targeting
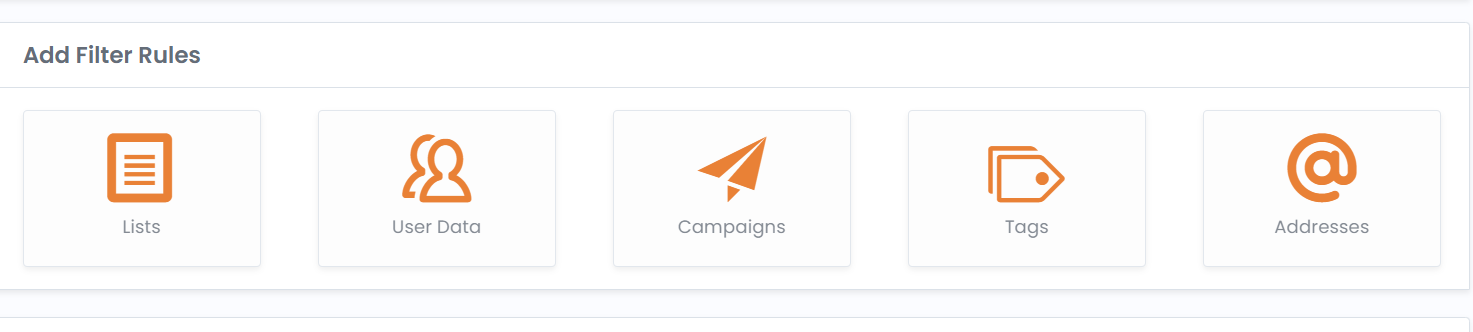
Targeting users is great when you are working with a large database and wish to find specific users based on:
List – This is the list in which the user is from and will only select the users on if they appear on this list.
User Data – Reads the users data to find a match on the condition asked. For example if you are looking for a user who is part of the company BTL then you would use Matches and search for BTL. As well as this you can add OR and AND tags to allow for multiple queries.
Campaigns – Can target users who have not been sent a certain campaign and can be set for within a certain time range. Furthermore you can target which email profile has been used to send the emails which can be good for finding any users who may be in the wrong list.
Tags – Looks for custom tags put onto a users profile. A good way you can use this is in combination with a workflow so that if a user has filled out a form it can put a tag on them that shows they have replied to the form and wish to continue and should be sent a follow up email to confirm their place.
Addresses – Can be used to find users based on the email domain used such as Gmail. As well as this it can be used to find more generic filters such as searching for emails that have “Chelsea” in the name.
All of these can be used in combination with each other to find the data that is required.
Realtime Block List
This is a tool that will allow you to block certain users based on many fields this is an automatic targeting system that will block all actions to that user such as automations and campaigns.
Domain Names – Will block all users with a certain domain such as “hotmail” or maybe an old email list that are no longer part of your company for example “buytoletwinners”.
Email Addresses – This will block certain emails only and will not block the whole domain such as “brandy@Mortgages.co.uk” will only block emails being sent to that user.
Anonymised Suppression – This will hide the users email address so that it cannot be seen or sent anything during campaigns and will block workflows from occurring.
Import – This is where you can bulk send users and works for all three options this is where you will be applying most of your blocks. As well as this it can remove accounts from being blocked in case a mistake was made.

Field Maps
This is used for exporting your data and from this you can choose what fields you want to export out. This is used only for when you wish to take the data and modify it on Excel and for the most part is not an important area. You can create new field maps to personalise the exact values you wish to extract.
User Tags
This is where you can create custom tags to attach to a set of users. This can be used for searching for users in a list easily or even used as a marker to see who has completed a form using automations.
As for creating a new tag it is as simple as giving it a name and can be applied to a user.

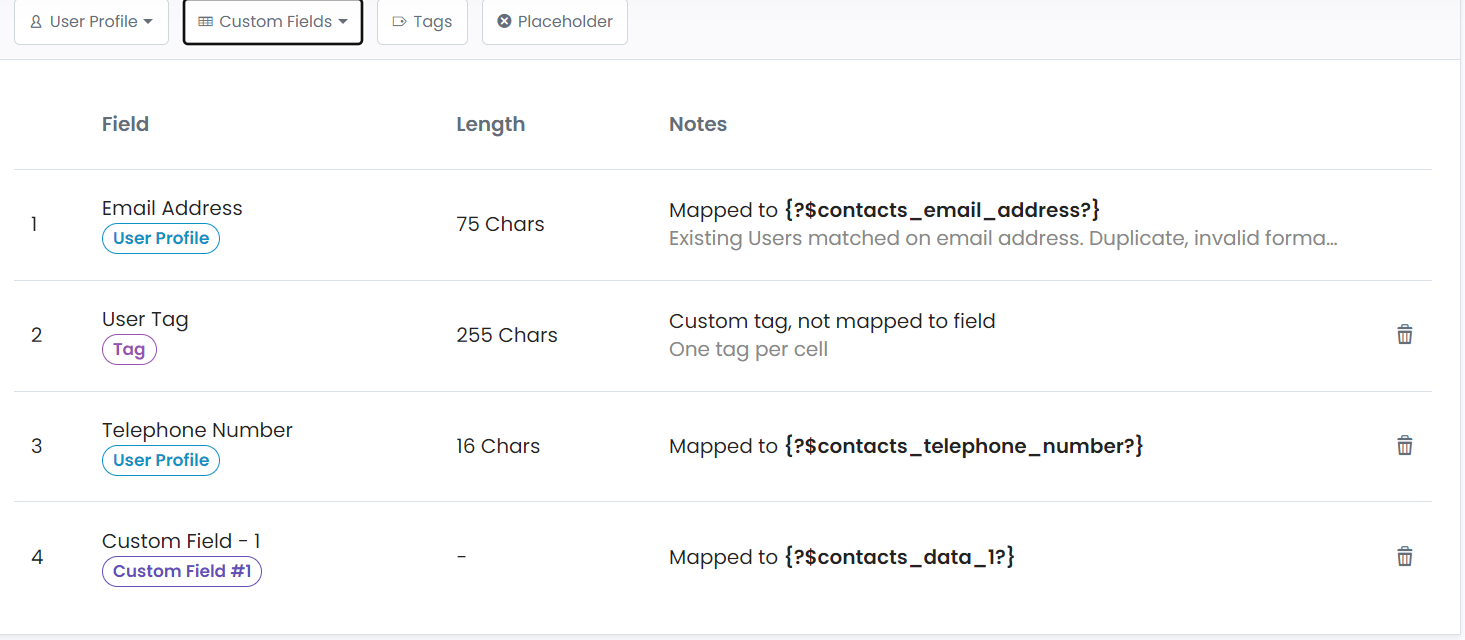
Field Name Labels
This is where you can add your very own fields so that you can add custom information to your database. It is important to know certain fields are already done for you and cannot be changed these are as follows:
Email , Reference , Salutation , First Name , Last Name , Company , Address Line 1, Address Line 2 , Address Line 3, Address Line 4 , City , Postcode , Country , Telephone, Mobile, Gender , Date of Birth.
As for the custom fields these can be whatever you want and will always be stored as a string due to the nature of the fields being dynamic. You will have a limit of 30 custom fields and this cannot be changed so always make sure to keep under that number.
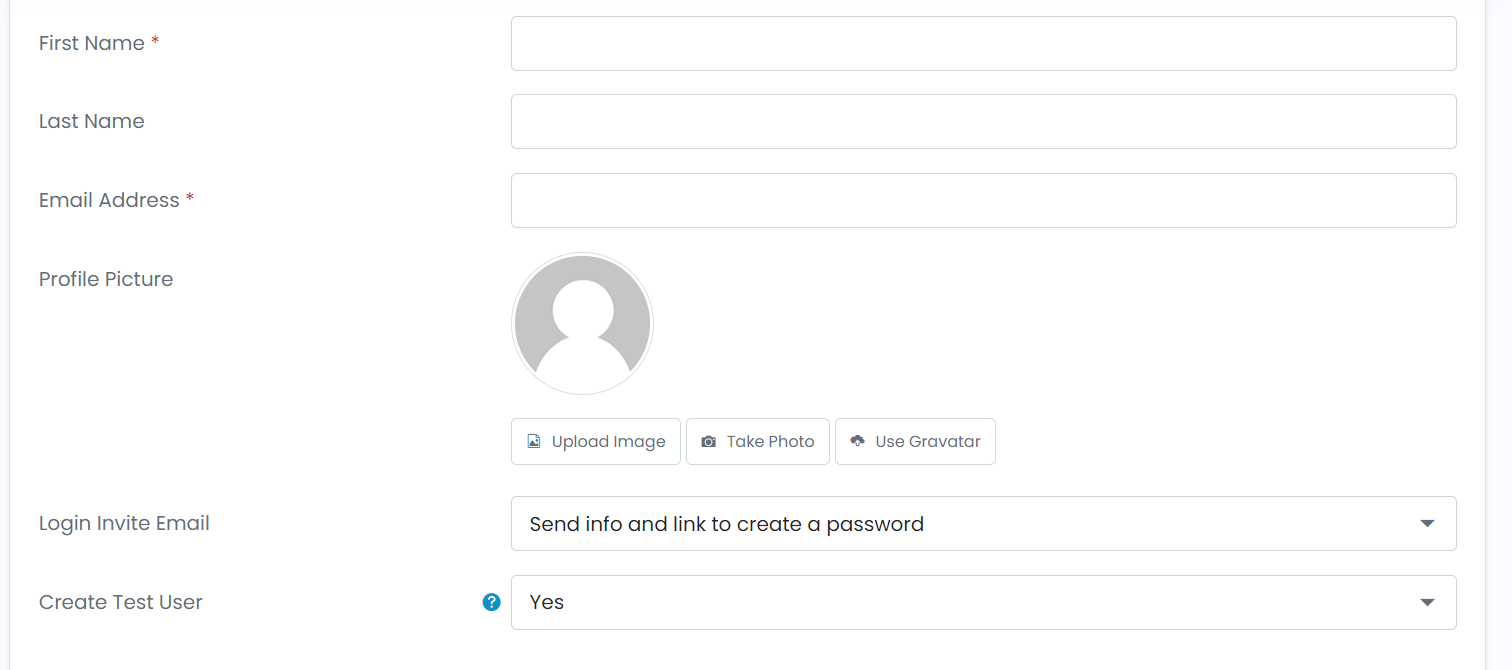
Adding New Login
Logins are people who can access the capture site and should only be given to people who will directly use the site. The first thing to do is look to the top of the screen and select the gear button and from that select manage logins. This will be an overview of all accounts that are part of the site as well as the permissions they have and when they last logged in.
To create a new login first select “Add new login” and then input the data that is for your account user. When selecting Login Invite Email you can decide whether or not you want to set their password manually or wish for them to change it. Once all the personal information is set you should now select the role they will have in the application. If they are a user and will use it only for sending out emails and checking campaigns you can add them as “Application User”. If you wish to give them the same permissions as an admin then you can assign them the role “Account Admin” for safety reasons only IT should have access to the admin role.
Past these settings are notifications which the user can change to what they want but if you want to set it up for them you can.
Resetting Passwords
If a user forgets their password or needs it changed they cannot do this themselves and it will require an admin to reset it for them. The way to do this is find the login information through settings/managelogins and clicking on the login that needs to be changed. You can then find the change password button and select a manual change or allow the user to change it through their email.

Account Reports
Account reports involves everything to do with the data your site generates and is an important part of making sure your security is good and an great way to see how your company is performing via campaigns.
Activity Summary- This is where you can see how many emails have been sent, SMS sent, triggers activated and APIs requested. For a more detailed report you can also see it by each month as well as selecting a custom time period. Furthermore you can export this as an excel file .
Compare Campaigns – This is where you can see how your campaigns performed against other campaigns you have sent and is helpfully displayed as a bar chart as well as this it gives information on how many failed to send or were bounced.
Recent Leads – This is where you can see if anybody has submitted the form and at what time they did so. This information is presented as a line chart and is great to see when the most people are opening and completing your forms.
Data Performance – This allows you to export as a CSV how well your email campaigns went as well as downloading a list of any domains that had a problem sending too and is great for checking for any faulty domain names. As well as this you can select a time date for whatever month you wish to view.
Data Retention – This where you can ensure that you are handling user data correctly and will let you know if there are any inactive users who have not been responding or interacting with your emails. If this is the case it will automatically delete these users if you have it set up to do so but if not you should keep up to date with data protection laws.
Email Campaign History – This is used to show a single campaigns success rate as well as showing how many people opted out of receiving your emails.
Workflow Activity – This will allow you to see how many workflows were triggered and by what they were set off by as well as how many were skipped due to blocked emails or other reasons.
Workflow Launches – This is how many manual workflows were launched and will show who sent them, when they were sent and how many times they were used which is great for prescheduling a weekly email to all clients.
Login History – This will show who logged in and what IP address they used when doing so. As well as this it will show if they failed or passed the login process which is good for security as well as finding out why a user may be blocked from the system.
Audit Trail – An audit trial is a log of all changes made to the site and will allow you to see who changed what so that if a template is changed you know who changed it and at what time they did this
User Activity Stream – This is what the user has sent out to the clients including workflows and campaign starts and ends. It is useful to make sure something has went out to who it should have at the correct time.
Forms
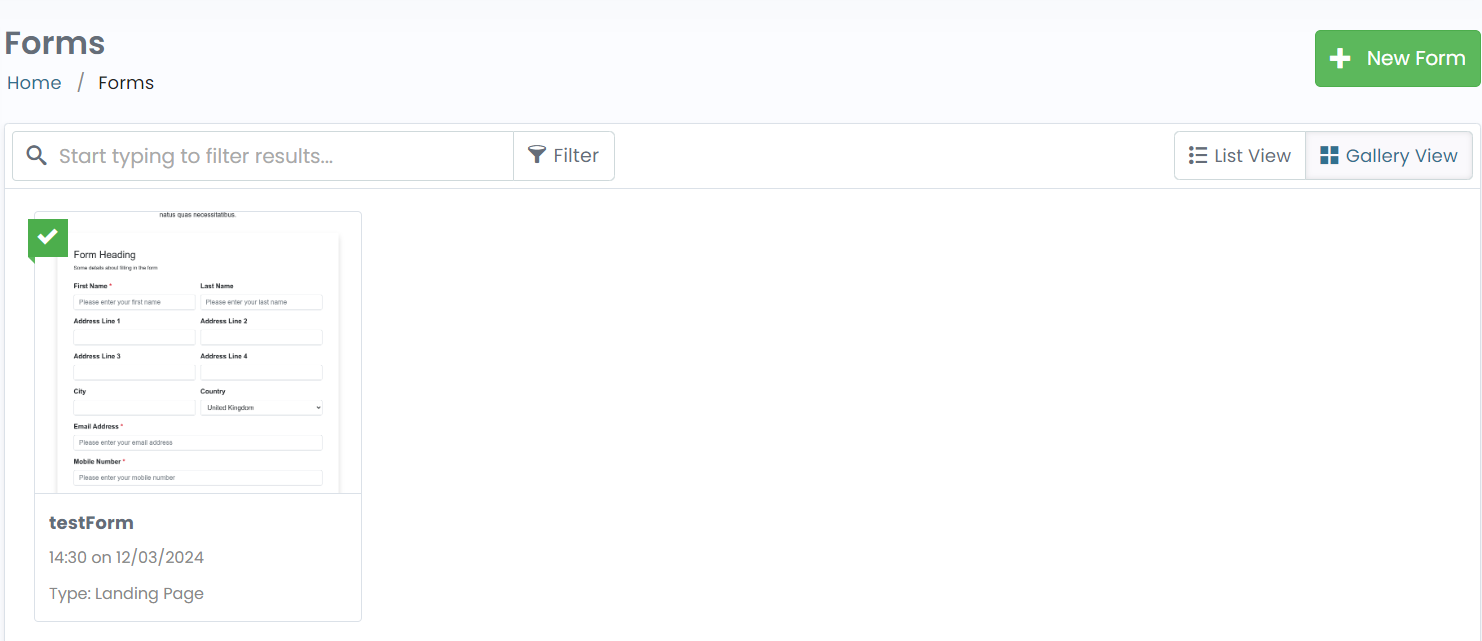
Making a form
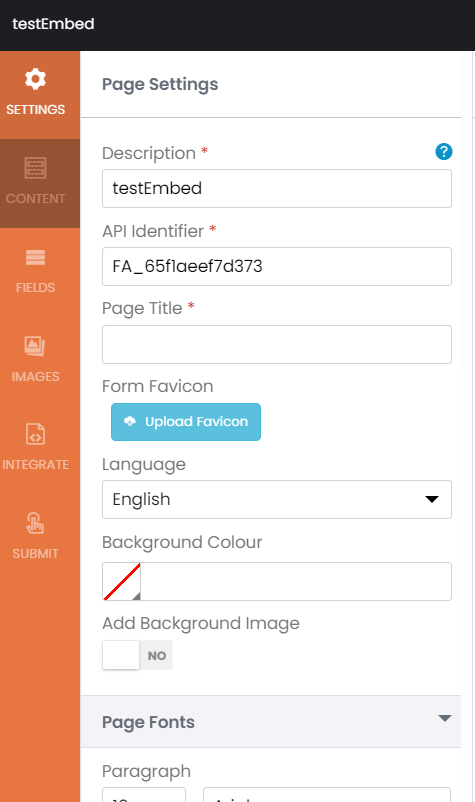
As an admin you are the only person who can create forms which is due to the different ways they can be presented via a webpage or even just a plain form. To start creating a form the best thing is to plan it out first as you might have to make some custom fields that can hold data that isn’t included as a base. Once you have a good idea of what you wish to put in your form you should click the form tab on the sidebar and select the “New form” button.
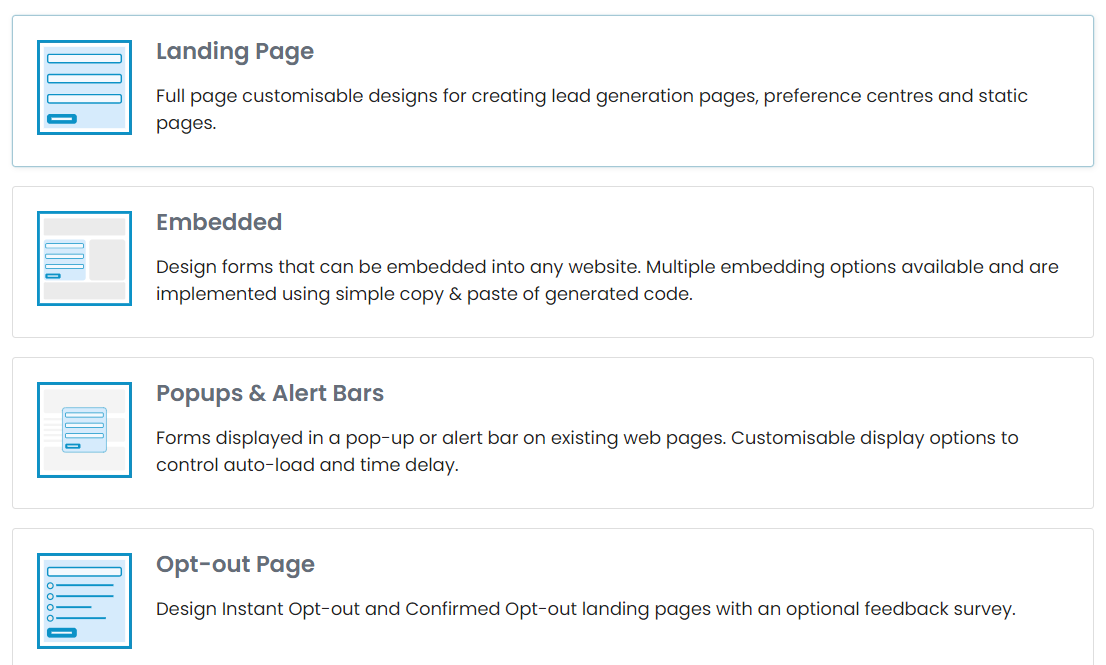
Types of forms
There are 4 types of ways capture will allow you to create a form and all are created the same but have different functions depending on your need and where you are planning to host them.
Landing Page – This a full page form that is great if you are planning to send these out or want them as a separate page on your website. This is the default option but it is good to remember that this cannot be part of a pre-existing website.
Embedded – This is a cut-out of a page and can be fit into any website by simply copying the API code and plugging it into your website. This cannot be sent out to users as it has to be part of a pre-existing website.
Popups & Alert Bars – These are similar to being embedded as they have to be hosted on a website however instead of appearing on a page it is instead a popup so that when the user enters a page and does a specific action it will ask them to fill out the form while keeping them on the same page.
Creating a form
Creating a form is similar to creating an email template where you have sections and fields. (https://meow.co.uk)
The main difference is the ability to have input through textboxes and other input methods. The first thing to do is select form in the sections area and drag it to the middle. Here you will see some pre-generated fields as well as a submit button.
In order to add a field drop and drag the field you wish to add and place it where it is needed Once you do this you will see all of the settings you can add to the field and this is where you will be changing everything about how it looks and handles the input.
Field Type – This is the data you want the user to input and will check to make sure the information provided matches the data type.
Placeholder Text – This is the text that is inside the input area whilst the user has not added anything. This can be a prompt to add something or could also be instructions on how best to fill it out.
Default Value – This is the value that is inside the input box before the user has inputted anything if the user doesn’t change the value it will be sent instead of a blank value.
Field Width- This is the amount of space that will be taken up by the section and by default sections will be set to full. Unlike email templates forms will always try to stack next to each other if possible so only use half if you wish to have two inputs next to one another.
Field Mapping – This is the most important part that links the input to the user’s custom field. This should be done for every text box and if it is not you will not be able to publish the form you should ensure that the data type you ask to collect is the same that is going to be stored.
Publishing a form
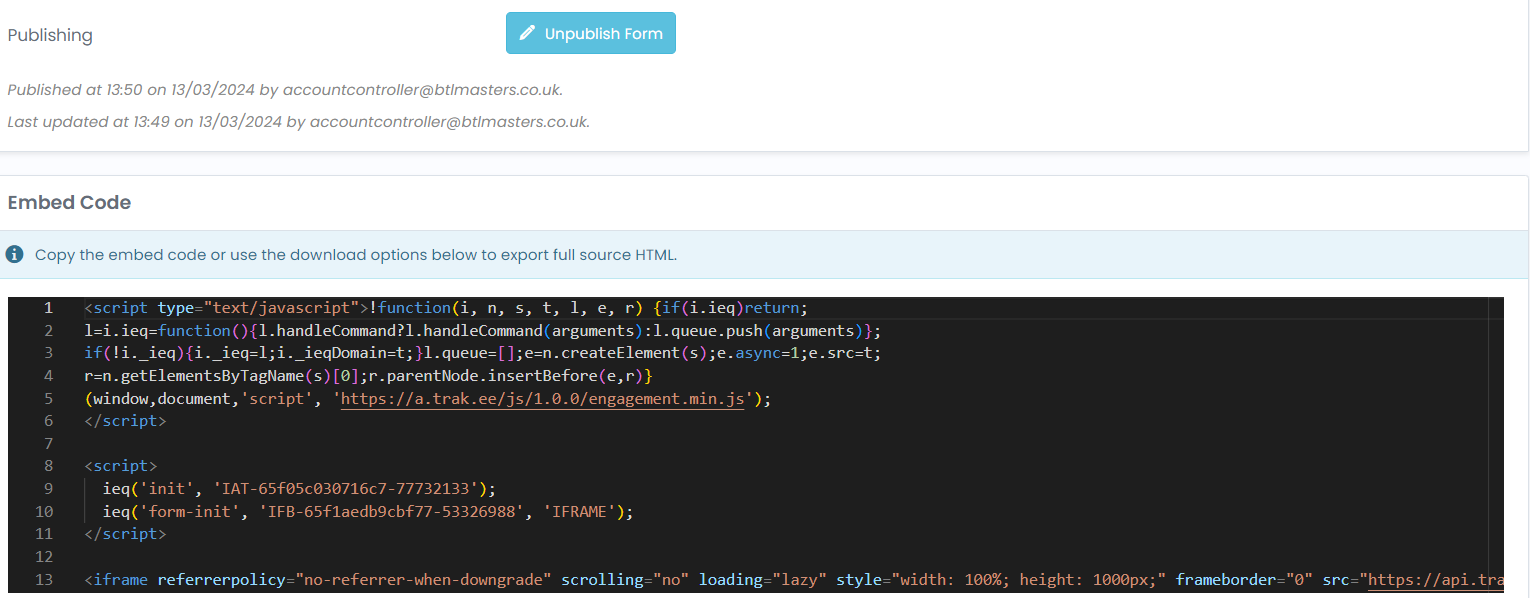
To publish a form you should make sure any errors that show up on the form have been checked and should test it to make sure that it works as intended and the data is saved to the correct place. Once this has all been checked you can now select publish form and wait for it to complete the initial setup. Once this comes through you are ready to collect data if you have used a landing page you can access the form using the link provided however if you wish to embed it there is a couple extra steps.
First you will need a website page and a place to place the form. Then you can copy and paste the code below and paste that into the page you wish to display it. Once you refresh the website it should all work and any users who use it will send that straight to Capture.
Automation
Making an automation
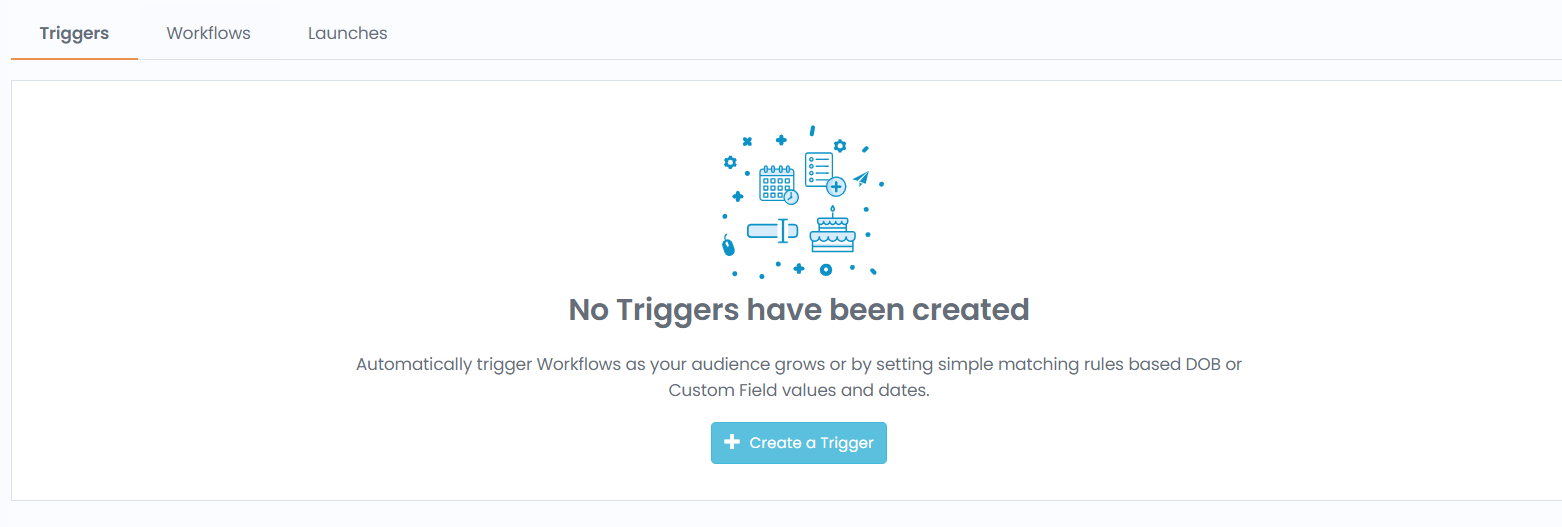
An automation is a bot that handles extra actions such as replying to an email or even notifying you that somebody has completed a form. To start creating a automation you need to first select what you wish to create:
Triggers : This will allow your bot to automatically start a workflow once an action has been started for example it could trigger a workflow that is activated by sending out a campaign.
Work Flow: This is the set of actions that will be done once they receive a trigger and can be sending emails back to the user as well as wating 24 hours before sending another email to let the user know they haven’t read the email yet.
Launches: This is an action that will be scheduled for all active users and can also be manually started therefore not requiring a trigger to start this is good for an email that should go to all active clients once a month.
Once you have selected what you want to make you can select “New Automation” and begin.
How to customise your automation
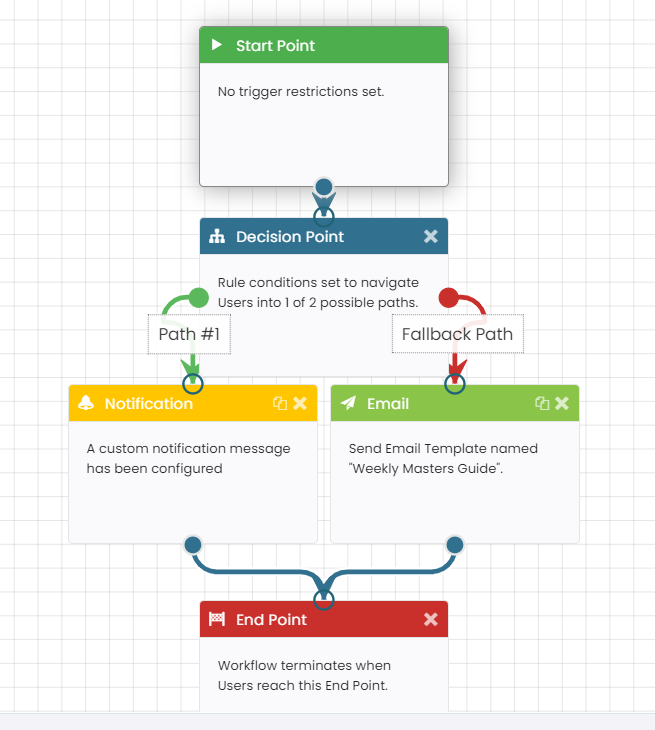
When first creating an automation it will have six pre-built pre-sets. If none of them apply then you will want to create a “custom workflow”! Once you pick this six more options will appear and if again none match what you need click “blank canvas” and give a Name and description to your new workflow.
As a basic tutorial we will be following a simple automation where if the user has opened an email then it will notify a user and if it doesn’t it will resend the email. Outside of this we have made a trigger to activate once a day.